
Welcome to our in-depth guide on leveraging HubSpot's ChatSpot and Content Assistant tools to revolutionize your marketing, sales, and service efforts. In this article, we'll explore how these powerful AI-driven tools can help you generate keywords, create content, manage contacts, and more.
With guided instructions and detailed prompts for each activity, you'll learn how to maximize your business operations using ChatSpot and Content Assistant. Let's dive right in!
Marketing | Keyword research & Blog Creation
Utilizing AI technology, ChatSpot, and Content Assistant makes brainstorming and the content creation process a breeze. In this section, we'll demonstrate how to generate keywords and craft a high-quality blog post with the help of our new AI toolkit.
Generate a list of keywords
Begin by opening the ChatSpot interface and entering a prompt related to your desired topic. For example, if you'd like to explore artificial intelligence, you can use the following prompt: "Generate a list of keywords related to the topic of artificial intelligence." ChatSpot will quickly provide a list of relevant keywords, making the brainstorming process efficient and straightforward.
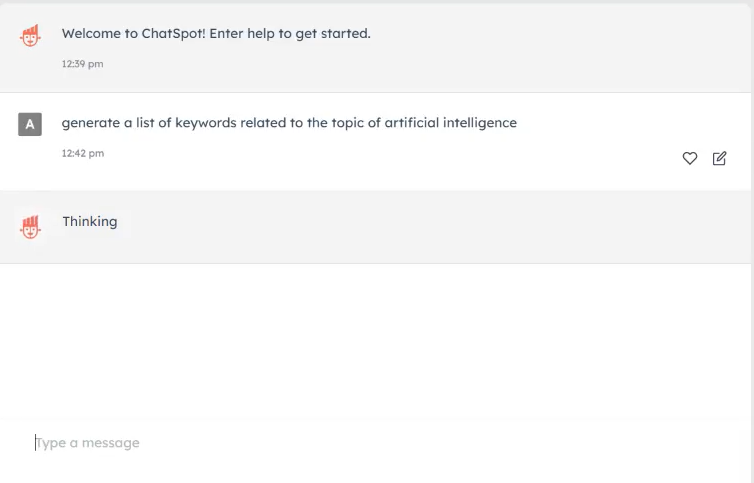
ChatSpot is hard at work on our prompt...
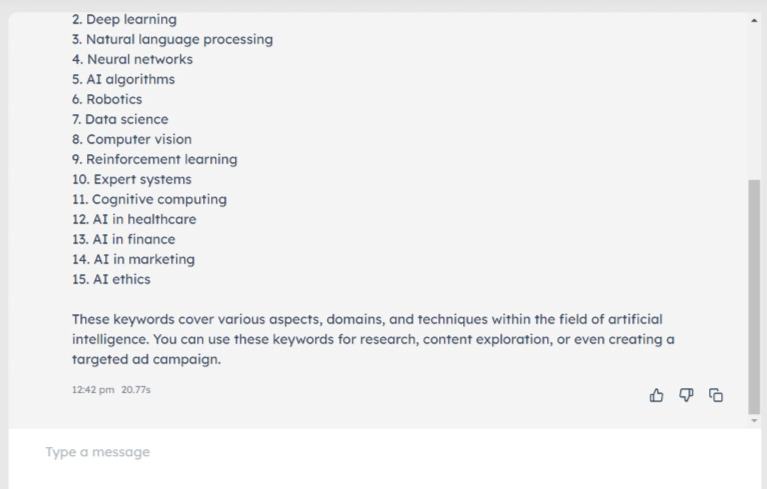
List of relevant keywords from the request, with a brief description included
Validate Keywords
After generating a list of keywords, it's essential to validate them for relevance, search volume, and other various SEO (search engine optimization) factors. This step ensures that your content targets the right audience and ranks well on search engines. This can be done through multiple methods, but our recommendation is to use either Moz’s Keyword Explorer tool or Spyfu.
Once you have validated your preferred choices from the list ChatSpot generated, select a keyword/topic that aligns with your goals for this blog article.
Generate a Blog Title
Once you've chosen a topic, use ChatSpot to create a captivating title for your blog post. Enter the following prompt: "What's a good title for a blog article about [selected topic]?" ChatSpot will provide a compelling title that captures the essence of your content. As a general guideline, if you ever feel that ChatSpot came up a little short, all you have to do is select ‘regenerate’.
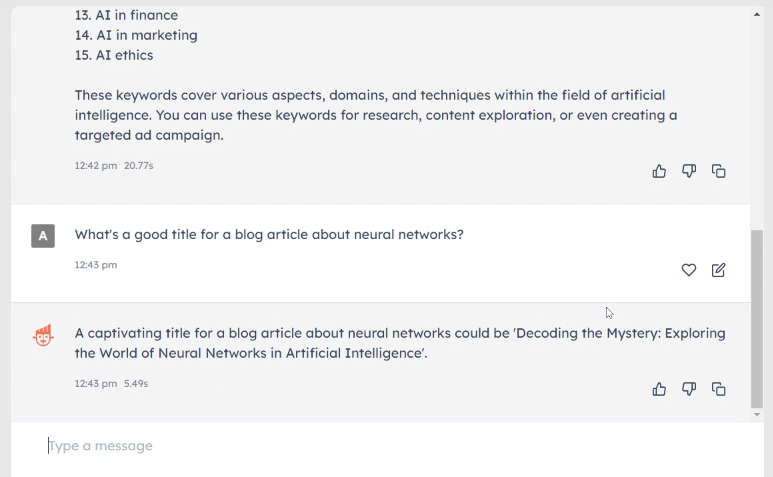
What's a good title for a blog article about neural networks?
Create a blog outline and content
With your blog title in hand, you can now use HubSpot's Content Assistant tool to generate a blog outline and craft a full blog post based on your selected keywords. Open Content Assistant and type "/" to access the tool. Write the following prompt: "Write an SEO-friendly blog outline for the topic of [selected topic]." This will generate an outline that you can use as a foundation for your blog article.
Create your article’s body by expanding the outline's bullet points into full paragraphs. To do this, you’d simply highlight a bullet point and select the ‘expand’ option. Repeat this step for all desired bullet points to fill out the blog body.
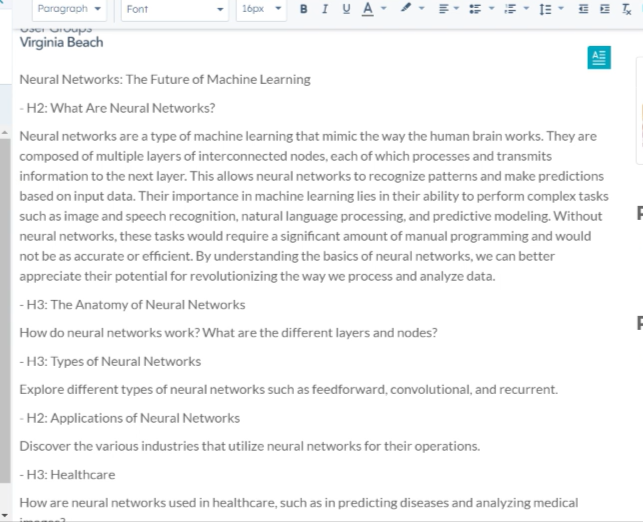
Blog outline with one filled-out section, with the help of Content Assistant
To wrap up your blog post, use Content Assistant to generate a conclusion statement. Go to the bottom of the text, type "/", and generate a fitting conclusion.
In just a few minutes, you'll have a complete blog post crafted with the help of ChatSpot and Content Assistant. This efficient process allows you to dedicate more time to other marketing activities, and any marketer will tell you there’s no shortage of those!
Sales | Adding a Contact & Crafting an Email
In this section, we'll explore how ChatSpot and Content Assistant can streamline the sales process by adding contacts to your CRM and crafting personalized emails.
Adding new contacts in Your CRM
Imagine you've just found information on a new contact and would like to add them to your CRM. ChatSpot can make this process quick and easy. Open the ChatSpot interface and enter the following prompt: "Add contact [contact name], [contact email]." You'll receive a confirmation message indicating that the contact has been added to your CRM.
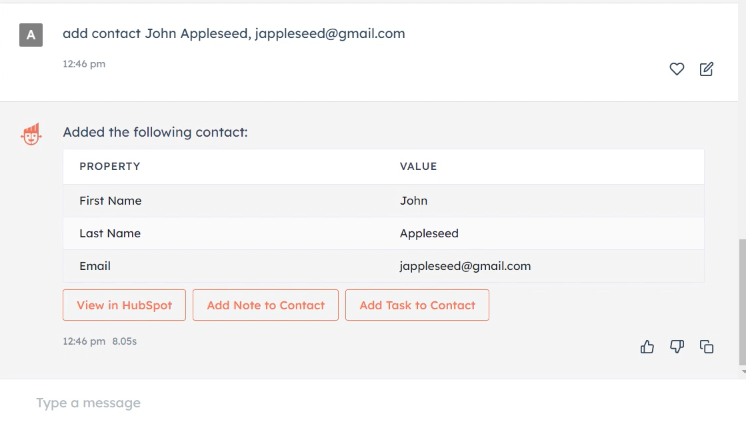
This window appears when you've successfully added a contact to your CRM.
Confirmation that our newly-created contact has been added to our CRM.
Create a personalized, one-off email
Now that you have a new contact in your CRM, you can use Content Assistant to create a personalized one-off email. This handy tool is even available in the HubSpot Chrome extension, making it accessible whenever you need it.
Follow these steps to craft a custom email for your new contact:
-
Open a new Gmail tab and enter the contact's email address.
-
Select the 'write email for me' option from the Content Assistant.
-
Choose the appropriate options for your email, including the type of outreach, target audience, key selling point, and desired tone.
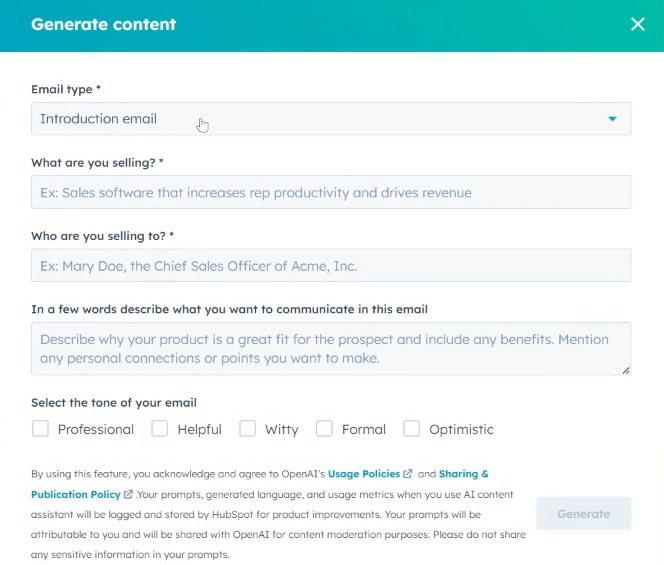
This window appears when you select the 'write email for me' option.
- Click 'Generate' to create a personalized email ready to send to your new contact. From there, select 'Insert Content' to place this text into your blank email.
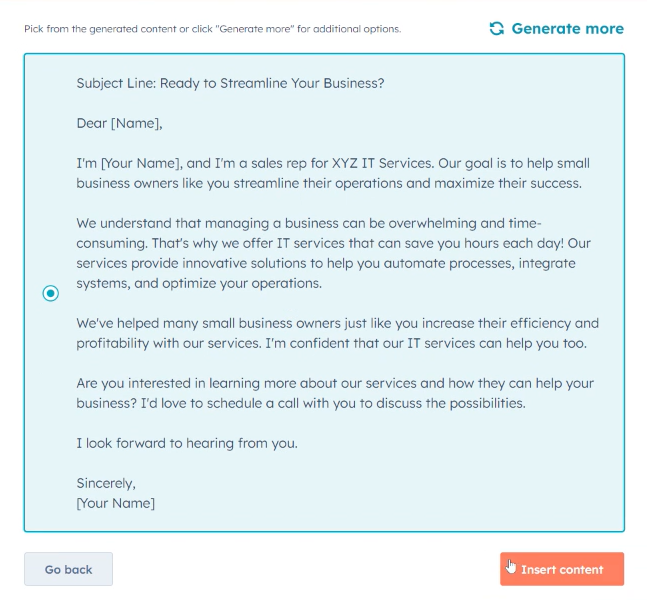
Preview of our full email, ready to be inserted
By utilizing ChatSpot and Content Assistant, you can efficiently manage your contacts and create custom emails that cater to your audience's needs with minimal effort. It looks like it's time to get back to smiling and dialing!
Services | Creating a Knowledge Base Article & Adjusting Tone
Let’s put ourselves in the shoes of a fictional IT company that is in the process of building out its knowledgebase and would like to create its first article. In this section, we'll examine how ChatSpot and Content Assistant can simplify this process in no time at all.
Generate a knowledge base article idea
Open the ChatSpot interface and enter a prompt to generate an idea for a knowledge base article related to your business. For example, you can ask: "What's a question that a customer of an IT company might have?" ChatSpot will provide a list of valuable topics for your knowledge base article.
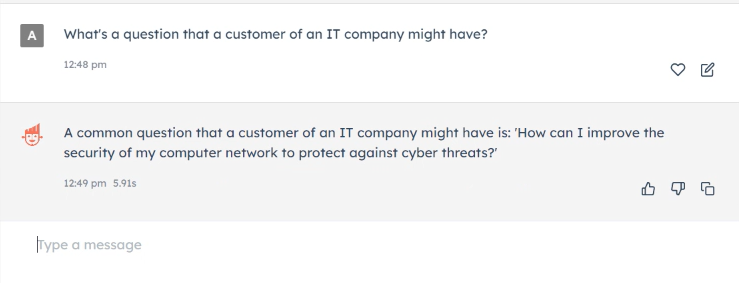
ChatSpot's response to our prompt
Create a Knowledge base article
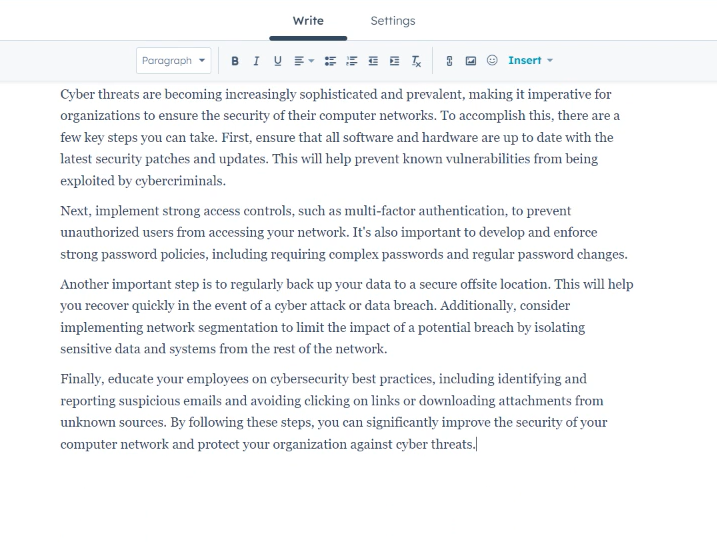
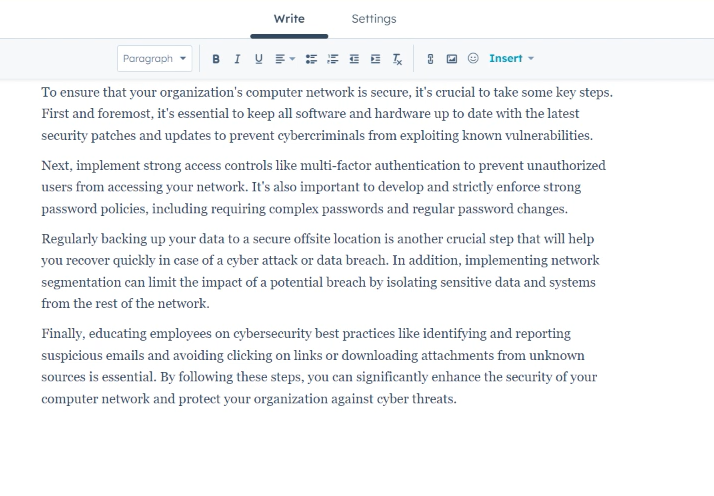
Once you've selected a topic, use HubSpot's Content Assistant tool to flesh it out. Create a new knowledge base article in HubSpot and enter the question generated by ChatSpot as the title. In the body of the article, write a brief introductory statement, such as "Here's how we address [topic]." Highlight the statement, select the ‘expand’ option, and insert the generated content.
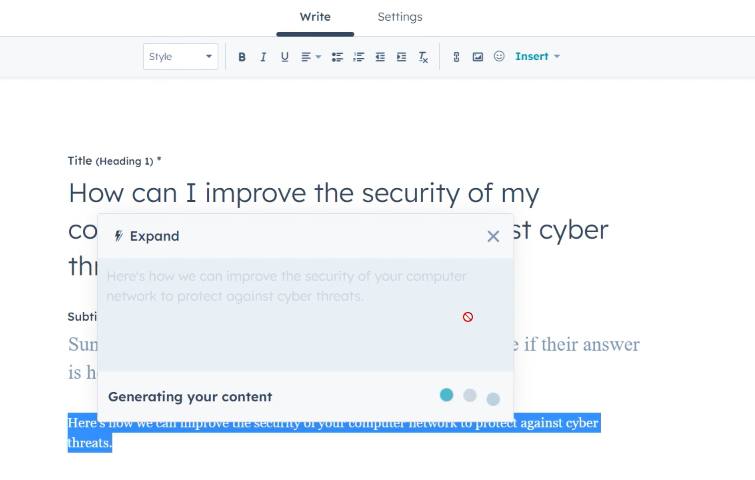
With Content Assistant, you can take one sentence...
...and expand it into a full article with the click of a button.
Tone adjustments
If you'd like to change the tone of your article to better suit your audience, Content Assistant makes it easy. Simply highlight the entire body of the article, select ‘change the tone’ (tip: for a knowledge base article, you’ll want to sound educational), and the tool will adjust the content accordingly.
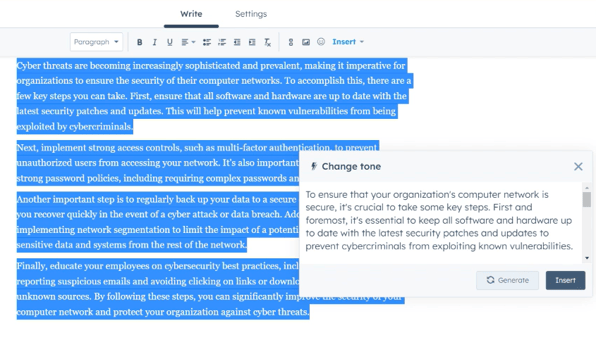
To change the tone, simply highlight the entire body and select 'change the tone.'
Finalized article body with an educational tone, thanks to Content Assistant
Finish your knowledge base article by adding a short subtitle (which can also be done with the help of Content Assistant), and you're all set!
Conclusion
As demonstrated in this comprehensive guide, HubSpot's ChatSpot and Content Assistant can greatly enhance your marketing, sales, and service efforts. By harnessing the power of these AI-driven tools, you can create engaging content, manage your contacts, and improve your overall business operations in no time. Don't wait – start reaping the benefits of ChatSpot and Content Assistant today!
Not sure where to begin, or do you have any other AI-related questions? Don’t hesitate to schedule a call with our dedicated team of growth professionals here at Eternal Works.
